Setting up a projector in your basement can transform an underused space into a personal home theater. Which offers an entirely new way to enjoy movies, television shows and video games. The benefits are numerous; from enhanced viewing experiences to added value for your home. This guide offers step-by-step instructions and practical advice on setting up your basement projector as seamlessly as possible so that cinematic experience comes right under your roof!
Benefits of Having a Projector in Basement
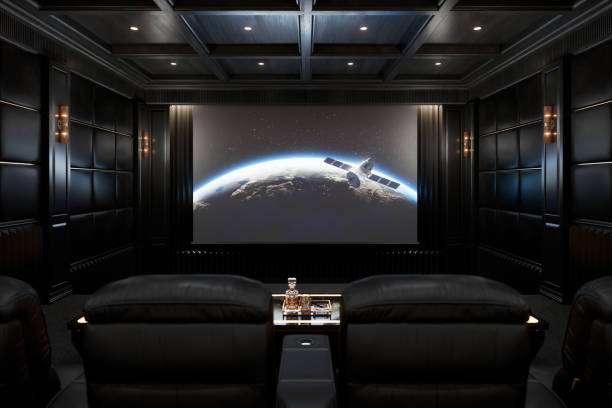
Create a Cinematic Experience Without Leaving Home
Having a projector in your basement allows you to enjoy a cinematic experience right in the comfort of your home. The large screen and immersive audio-visual experience provided by a projector setup can rival that of commercial theaters, making every movie night a memorable one.
Utilize Unused Basement Space
Basements often become underutilized areas in many homes. By setting up a projector, you can transform this space into a fully functional home theater, giving purpose to what might otherwise be an overlooked area of your house.
Enjoy Family Movie Nights and Entertainment

A basement projector setup can become the centerpiece of family entertainment. Whether it’s hosting movie nights, watching major sporting events, or even conducting a children’s film festival during the holidays, the opportunities for fun and bonding are endless.
Preparing Your Basement for Projector Setup
Before diving into the technicalities of setting up your projector, it’s important to prepare your basement adequately. This will ensure that you maximize the benefits and enjoy a truly immersive entertainment experience.
Assess the Basement Space for Suitability
The first step in setting up a projector in your basement is to assess the suitability of the space. Consider the size, shape, and layout of your basement. Is it large enough to accommodate a projector screen and seating? Are there low ceilings or pillars that could obstruct the view? These are some of the questions that need to be addressed during the initial assessment.
Choose the Right Location for the Projector Screen
Choosing the right location for your screen is crucial for optimal viewing. Ideally, the screen should be placed on a wide, unobstructed wall. The distance between the screen and the seating should be approximately twice the width of the screen for the best viewing experience. Also, ensure there is enough space for the projector itself, which should be positioned opposite the screen.
Consider Lighting and Sound Insulation
Basements often have minimal natural light, which can be an advantage for a projector setup as it reduces glare on the screen. However, you may need to add some soft artificial lighting for comfort. In terms of sound, consider if any soundproofing measures are necessary to prevent noise from filtering through to the rest of the house. Adding rugs, wall hangings, or even acoustic panels can help absorb sound and enhance the audio quality in your home theater.
Selecting the Right Projector for Your Basement Home Theater

Types of Projectors Available
There is a range of projectors available on the market, each suitable for different purposes. The most common types are:
- DLP (Digital Light Processing): This type uses tiny mirrors to project images, producing sharp and vibrant visuals. Most DLP projectors are compact, making them suitable for small basements.
- LCD (Liquid Crystal Display): LCD projectors utilize three liquid crystal panels to create images. They offer excellent color saturation and sharper images compared to DLP projectors, but they may be costlier.
- LED (Light Emitting Diodes): Unlike DLP and LCD projectors that require lamp replacement, LED projectors have a longer lifespan. They offer energy efficiency and portability, but their brightness may be less compared to the other types.
Factors to Consider When Choosing a Projector
When choosing a projector for your basement home theater, consider the following factors:
- Resolution: Higher resolution will provide you with a sharper image. If you can, opt for a High Definition (HD) or 4K projector to get the best picture quality.
- Brightness: Since basements typically have minimal natural light, you may not need an ultra-high brightness projector. However, if you plan to use artificial lighting, go for a projector with a higher lumen count.
- Contrast Ratio: This refers to the difference between the lightest and darkest parts of the image. A higher contrast ratio gives a more detailed picture.
- Throw Ratio: This is the distance between the projector and the screen relative to the width of the image displayed. Depending on your basement’s size and layout, you might need a short-throw projector (for smaller spaces) or a long-throw projector (for larger areas).
Budget-Friendly Projector Recommendations
If you’re working on a budget, there are several affordable projectors that do not compromise on quality. Some of the best ones include:
- BenQ MH530FHD: This is a Full HD DLP projector that offers excellent picture quality and a high contrast ratio at a reasonable price.
- Epson VS250: This LCD projector is known for its high brightness and great color accuracy. It’s an excellent choice if you plan to use artificial lighting in your basement.
- Optoma HD146X: This projector provides high-quality images with vibrant colors and sharp details. It’s a great budget option for a home theater setup.
Projector Screen and Viewing Distance
Selecting the Appropriate Screen Size
Choosing the right screen size for your basement home theater is crucial for optimal viewing. The size is determined by the distance to your seating area and the projector’s throw ratio. As a rule, experts suggest the screen size (measured diagonally) should be about half the distance to the seating area. Personal preference and aspect ratio also matter.
Calculating the Optimal Viewing Distance
To find the optimal viewing distance for your setup, you can use either the SMPTE or THX method. SMPTE recommends a distance of 1.5 to 2.5 times the screen width, while THX suggests 0.84 times the width for 1080p resolution. Consider the projector’s resolution and viewer comfort when determining the optimal distance.
Screen Material Options
When it comes to screen material, there are various options, each with its own benefits. Matte white screens offer wide viewing angles with no glare. Gray screens enhance contrast and work well in rooms with ambient light. High-gain screens increase brightness but have a limited viewing angle. Lastly, acoustically transparent screens allow speakers to be placed behind them for an immersive audiovisual experience. Choose a screen material that suits your basement’s lighting conditions and projector capabilities.
Setting Up the Projector in Basement

Step-by-Step Guide on Installing the Projector Mount
Mounting your projector properly is crucial for the best viewing experience. Here’s a simple step-by-step guide:
- Choose the optimal location: This should provide a clear, unobstructed path to your screen and be within reach of a power source.
- Mark the mounting holes: Hold the mount against the ceiling at your chosen spot and mark the spots where you’ll drill holes for the screws.
- Drill the holes: Using a power drill, drill the holes where marked.
- Attach the mount: Using screws, securely fasten your mount to the ceiling. Ensure it’s stable before moving on to the next step.
- Attach the projector: Follow the manufacturer’s instructions to attach your projector to the mount, ensuring it’s secure and aligned with your screen.
Connecting the Projector to Your Audio and Video Sources
Once your projector is securely mounted, you need to connect it to your audio and video sources:
- Video Sources: Connect your video sources (such as a DVD player, gaming console, or streaming device) to your projector using HDMI cables.
- Audio Sources: Connect your audio sources (like a soundbar or surround sound speakers) to your projector. This is typically done via an audio receiver using RCA, optical, or HDMI cables. Remember to follow the manufacturer’s instructions for best results.
Adjusting Projector Settings for Optimal Image Quality
After everything is installed and connected, you should adjust your projector settings for optimal image quality:
- Focus: Most projectors have a focus wheel or knob that allows you to sharpen the image.
- Zoom: If your projector has a zoom feature, adjust it to fit the image to your screen size.
- Keystone correction: This feature helps rectify any image distortion caused by the angle of the projector to the screen. Use it to ensure the image is perfectly rectangular.
- Brightness, contrast, and color: Depending on the projector model, you can usually adjust these settings to suit your personal preference and the ambient light in your basement.
- Aspect ratio: Ensure the aspect ratio setting on your projector matches that of your content source. Most movies and TV shows use a 16:9 aspect ratio.
After these adjustments, your basement projector setup should be ready for a fantastic home theater experience!
Sound System and Acoustics
Tips for Choosing a Suitable Sound System
Selecting a sound system that complements your projector is key to creating a cinematic experience in your basement. Here are a few points to consider:
- Sound Quality: Ensure your chosen sound system delivers clear, crisp audio with a balance of bass, midrange, and treble.
- Surround Sound: For a true home theater atmosphere, opt for a surround sound system. A 5.1 system (which includes five speakers and a subwoofer) is a popular choice.
- Connection Options: Make sure your sound system has the necessary input/output options to connect to your projector or receiver, such as HDMI, RCA or optical ports.
- Room Size: The size of your basement can affect the sound. Smaller rooms may require less powerful speakers, while larger basements might benefit from additional or bigger speakers.
Strategies to Improve Acoustics in the Basement
Your basement’s acoustics can significantly impact your sound quality. Here are some strategies to improve them:
- Use Absorbent Materials: Use carpeting, curtains, or acoustic panels to absorb sound and prevent echo.
- Positioning of Speakers: Place your speakers strategically for balanced sound. Avoid positioning speakers in corners where sound can bounce off multiple surfaces.
- Furniture Placement: Soft furnishings like couches can absorb sound and reduce echo, while hard surfaces can cause sound reflection.
- Room Shape: If possible, avoid square rooms since they can create standing waves that negatively impact sound quality.
Creating a Surround Sound Experience
To achieve a surround sound experience in your home theater, follow these tips:
- Speaker Placement: Position your speakers correctly. Typically, the center speaker is placed above or below the screen, the front speakers are on either side, and the rear speakers are behind the viewing area.
- Subwoofer Placement: Experiment with the placement of your subwoofer to find the spot where it delivers the best bass response.
- Calibration: Most surround sound systems come with a calibration tool. Use this to adjust the sound from each speaker to ensure it reaches the viewer at the same time.
- Seating Position: For the best audio experience, the main viewing position should be situated at the center of the room, equidistant from the surround speakers.
With the right sound system and acoustics, your basement projector setup will be a place for unforgettable cinema-like experiences.
Connectivity and Smart Features
Connecting Streaming Devices and Gaming Consoles
Connecting your streaming devices and gaming consoles to a projector enhances your entertainment experience. Firstly, ensure that your devices have HDMI outputs, as this is the most common connection method. Simply plug an HDMI cable into your device and the projector’s HDMI input. For devices without HDMI, look for alternate outputs like VGA or DVI, and ensure your projector supports these inputs or that you have the necessary adaptors. Consult your device’s and projector’s manuals for specific instructions.
Smart Home Integration
Smart home integration enables seamless control of your devices using voice commands or mobile apps. For example, projectors can integrate with systems like Google Home or Amazon Echo, allowing voice control. These systems also manage other aspects of your home theater, like lighting and temperature, for an immersive viewing experience.
Controlling the Setup with a Smartphone or Remote
Controlling your home theater setup with a smartphone or remote is convenient and flexible. Many projectors have a dedicated remote control for adjusting volume, source input, and image settings from your seat. Alternatively, some projectors offer smartphone control through a dedicated app. Just make sure your projector and smartphone are connected to the same Wi-Fi network for this feature to work.
Troubleshooting Common Issues
Common Issues with Basement Projector Setup
Despite careful setup and calibration, you may face certain issues with your basement projector setup such as image misalignment, connectivity problems, or poor sound quality. Here’s how to address these common problems:
- Image Misalignment: If your projector’s image is skewed or not properly aligned with the screen, first check the position of the projector. Make sure it’s centered with the screen and adjust the keystone correction if necessary. Also, ensure the screen surface is flat and properly mounted.
- Connectivity Issues: If your projector isn’t receiving a signal from your source device, ensure all cables are securely connected. Check the input selection on your projector to ensure it’s set to the correct source. Also, try a different HDMI cable or port if available, as these can sometimes be the cause.
- Poor Sound Quality: If the sound quality isn’t as expected, check all audio connections. Test the balance and volume of each speaker to ensure they’re set up correctly. The room acoustics also significantly impact sound quality, so consider adding absorbent materials if the audio feels echoey or hollow.
Solutions and Troubleshooting Tips
For most issues, some basic troubleshooting can help resolve the problem:
- Reset Settings: If you’re experiencing issues, consider resetting your projector to its factory settings. This can often clear up any settings that may have been accidentally changed.
- Check Updates: Ensure your projector’s firmware is up-to-date, as manufacturers often release updates to fix common issues.
- Test on Another Device: If you have connectivity issues, try connecting your projector to a different device to check if the problem lies with the source device or the projector itself.
Seeking Professional Help
If you’ve attempted the above troubleshooting tips and are still experiencing problems, it may be time to seek professional help. Reach out to the manufacturer’s customer service for specific issues related to your projector model. You could also consider hiring a professional home theater installer, who can diagnose and resolve more complex problems. Remember, it’s better to seek help than potentially cause more damage by trying to fix an issue you’re not familiar with.
Maintenance and Upkeep

Regular maintenance is crucial for optimal operation and longevity of your basement projector setup. Here are some guidelines:
Projector Maintenance Guidelines
Routine checks and servicing keep your projector in top shape. Allow the projector to cool down before performing any maintenance. Regularly inspect the fans to prevent overheating, which can degrade performance. Pay attention to unusual noises that may indicate mechanical issues requiring professional attention.
Cleaning and Bulb Replacement
Regular cleaning is vital for maintaining image quality. Use a soft, lint-free cloth to clean the lens. Follow the manufacturer’s instructions to clean or replace the projector’s filter. Replace bulbs periodically to maintain brightness and clarity. Consult your projector’s manual for the correct bulb type and follow safety guidelines for replacement.
Keeping Software Updated
Regularly update your projector’s software for optimal performance. Software updates provide bug fixes, new features, and improvements. Check the manufacturer’s website or projector settings for available firmware or software updates. Updated software reduces the risk of security breaches, ensuring a safe and smooth viewing experience in your basement.
Conclusion
Installing a projector in your basement can create an unparalleled entertainment experience, bringing all the joy of the movie theater right into the comfort of your own home. From selecting and installing equipment, integrating it into smart home systems and controlling them via smartphone control apps, to troubleshooting common issues and performing regular maintenance on it – this guide has everything you need to create your own home theater! Technical difficulties shouldn’t prevent you from starting your projector setup today and enjoy.
We hope that this information will be helpful. This information is gathered from different surveys, health centers, and tech giants like Techradar, digitaltrends and many others. Our top priority is to provide you valuable information. Please comment about your experience so that we can accommodate you more perfectly.


